First finish for 2014
By
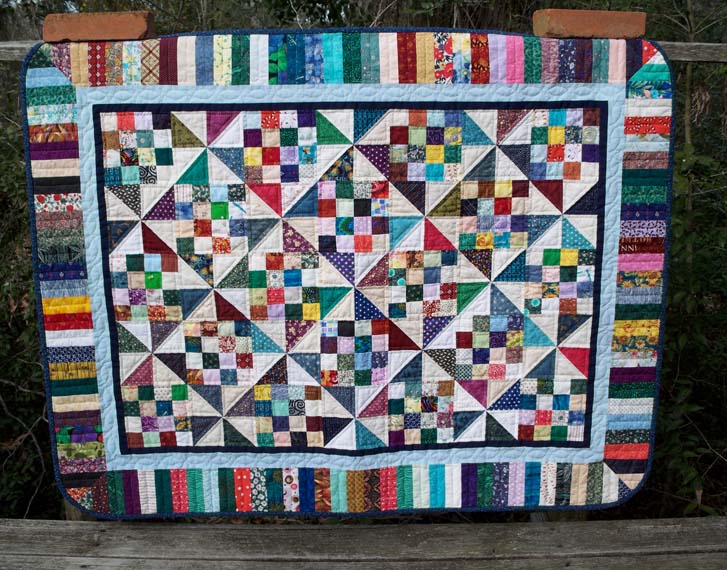
I finished my first project of 2014. It’s a quilt for a baby boy expected to arrive in Spring. The pattern is called Patches ‘n Pinwheels and is machine assembled and hand quilted. I used high-loft polyester batting for extra softness and rapid drying.
Most of the pieces to assemble the quilt were left from other quilt projects. The dark and pale blue borders were left from making Jacob’s Shirt Quilt, the piano border is leftover pieces from The Between Quilt and the various scraps are from my ever-growing pile of clothing sewing scraps. I love having a large stash from which to choose.
This is another hand quilted project from my hoop. I’ve found I truly enjoy hand stitching as I watch movies on my computer at night. It’s very relaxing and I try to have a project available for stitching every night.
The finished quilt measures 54″ x 42″.
Shirl
Categories: Quilting
A finish for 2013… just barely!
By
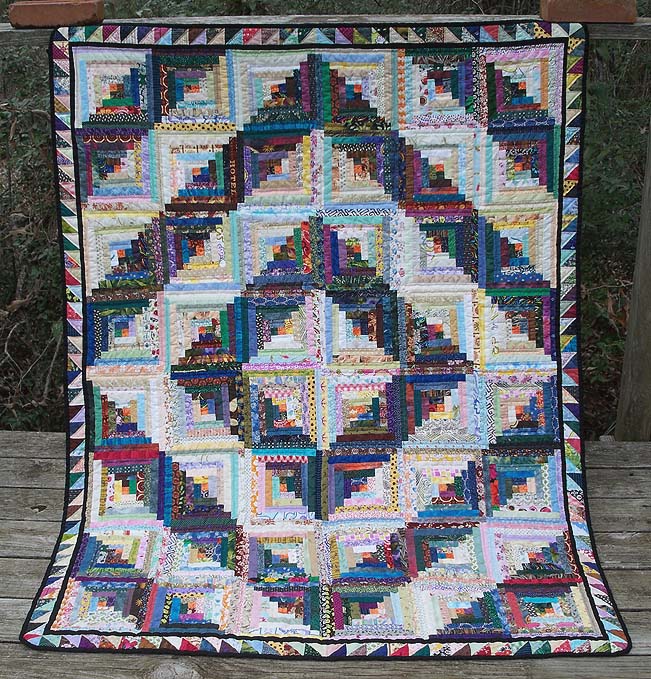
I’ve been cutting and stitching like crazy in hopes of finishing a sofa quilt for Christmas gifting. It certainly would have been a wiser decision had it been made earlier in the year but the idea came to me in November.
It’s been a perfect project for the bitter cold, icy days we’ve been experiencing. I’ve enjoyed digging through my ever-growing stash for light and dark fabrics. The only tedious part was cutting hundreds of strips to finish at 3/4″. Thankfully, all materials and supplies needed to make this quilt was on hand so I wasn’t required to venture out in nasty weather.
It was hand quilted in a hoop while I watched movies on my computer. Unfortunately, the hoop broke as I was finishing the last block. I order new hoops and worked at quilting the sawtooth border without one. Because of the weather delays for shipping, the new hoops didn’t arrive until the quilt was already finished.
Oh well! Now I’ll just have to plan another hoop-quilted project. A friend of my son is soon to welcome a new baby. Sounds like a good excuse to make another quilt.
I’ve had my eye on a free pattern featured on Bonnie Hunter’s Quiltville blog. I want to make Patches and Pinwheels and think it will be a precious baby boy’s quilt.
I want to wish everyone a fabulous, fun-filled Christmas and a joyous and blessed New Year!
Shirl
Comments closed
New Sale Fabric
By
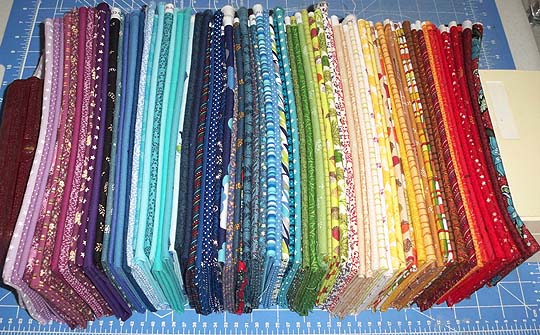 I took advantage of Connecting Threads‘ Black Monday online fabric sales and purchased 79+ fat quarters for less than $50!!! That’s only 63¢ each for excellent, high quality fabric. I can’t beat that price even for lower quality fabric on eBay®. SCORE!!
Naturally because the order was made during peak online sale period, Connecting Threads warned there may be a little delay in shipping. They had no idea our area’s major shipping hub would be iced in for days. Because of Mother Nature, the order took 13 calendar days to arrive but since I have no explicit plans for this fabric, it didn’t matter. I love every piece of it!!
It took 3 days to wash, iron, fold and pet all of it. I’m also thrilled that Connecting Threads includes the bolt ends with each bundle. BONUS! One of the ends is barely short of being a complete fat quarter and several more are fat eighth size… all free! My PHAT fabric stash is happy, happy, happy.
Since mid November, I’ve spent every minute of spare time piecing and hand quilting a sofa-sized log cabin quilt. All that’s left to do is cut and stitch the binding and launder. It’s turning out really pretty and I plan to gift it. I used high-loft batting so it’s super snuggly. I’m sure it will be enjoyed.
Jacob is here this weekend so I’ve been doing extra cooking. I love spoiling him! I spent a full day making homemade noodles for us to eat and him to take home. Today, I’ll bake a couple of batches of cookies. He’s requested cheezy potato and ham soup for dinner which isn’t difficult or time consuming. I’ll finally get a chance to relax this evening.
Maybe I’ll start planning my next hand sewing project.
Shirl
Comments closed
More? Oh my!
By
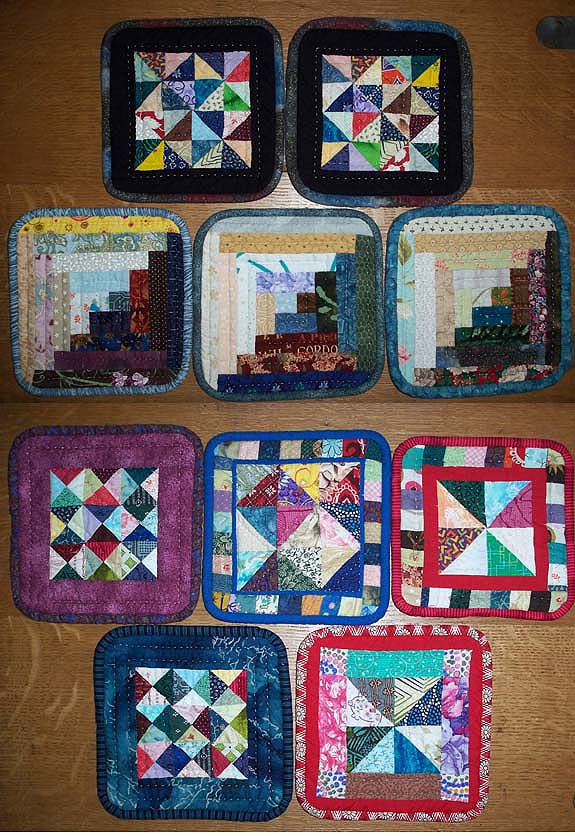
In case I didn’t have enough, I’ve assembled more potholders from quilt making leftovers. They really are fun to make and I’m so attracted to the fact they cost little more than time and effort. What fun it is while busily cooking to open a drawer and grab one or two of these bright and happy potholders… and they WORK GOOD!! Frankly, it’s a little unusual to have new and clean potholders in our kitchen. I could get used to this! Hmmm, now I need to score new cup towels.
It’s been quiet here during this Thanksgiving weekend. We celebrated when Jacob was here last weekend, eating typical turkey, dressing, green bean casserole, cranberry sauce and LOTS of cookies. I baked several types of cookies with thoughts Jake could take them home to share with his roommates. When I spoke with him Wednesday, he said most were gone and he was planning to finish them off that night. So glad they enjoyed them.
Shirl
Comments closed
More scrappy fun
By
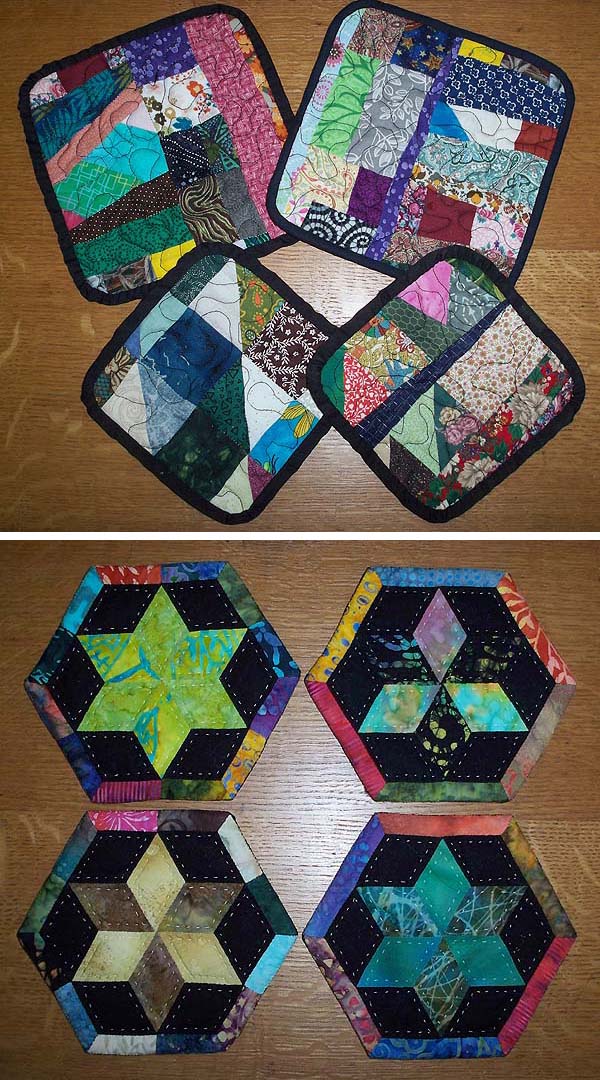
I continue to enjoy using scraps and crumbs to make useful items for our home. These potholders were made by treadle-sewing fabric scraps to foundation (used printer) paper for both front and back sides. After removing the paper, they are sandwiched with Unsul-Bright® Insulated Lining and cotton batting. I used the treadle machine to free-motion quilt and apply black binding. I finished the binding by hand.
I ♥ how they turned out and even DH said he wouldn’t be surprised to see potholders like these in a gourmet shop for $10 – 20 EACH! That’s pretty high praise from a guy who would just as well use his shirttail to handle hot pots. We’ll see how long he keeps these clean!
Since it’s been rainy and dreary for the past several days, I’ve been looking for a hand project to do. I have finally finished making batik stars for the Tumbling Stars quilt top (see Unfinished Projects in the sidebar), so I decided to use some leftover crumbs to make hand stitched potholders. I ♥ the way they look and am considering giving some as holiday gifts. These are backed with black fabric and big-stitch hand quilted (it’s impossible to make tiny stitches through 2 layers of fabric, cotton batting and Insul-Bright). Pictured is the first four made and I will start making more tonight.
This week found me back at the doctor’s office for another attempt to overcome a persistent urinary tract infection. I was given 3 different antibiotics this time in hopes of a cure. It leaves me wondering if the pills will cure the infection or kill me trying. Hope to feel better soon.
Shirl
Smarter Feet
By
Just returned from another jaunt to Louisiana. Brother Jim and I spent 3 days and 2 nights enjoying casino slots play and delicious food. This time, we decided to try new restaurants and ended up eating ‘American’ foods, like chicken fried steak and prime rib. We found super bargains on all meals with very generous portions and delicious items. The prime rib was on ‘special’….all you can eat for $20 including big baked potato and salad. I can’t say I’ve tasted better even for 3 times the price. As always, we had a great time throughout the entire trip and are already discussing our next one possibly early in 2014.
As my feet learn to operate correctly on a treadle, I’ve sewn scrap fabric to paper foundations (see previous post). I had no idea how I would use these bold, bright creations but it offered perfect practice for learning a new skill without harming new fabric. My feet feel sassy-smart now! Diva toes?!
I’ve now become somewhat addicted to sewing bits and crumbs of fabric to paper foundations – and hey, the small scraps bin is not so full. I’m even using scrap thread – those spool ends not big enough to make a ‘real’ project. I love clearing out the last of bits and pieces! More room for new stuff!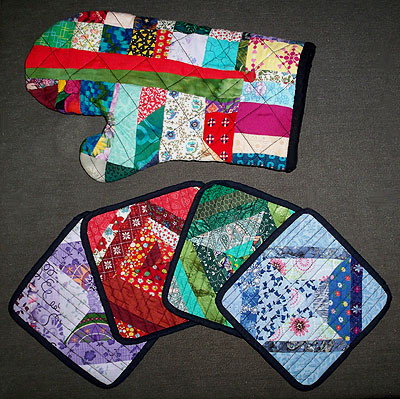
As I pondered how I would use these foundation paper-pieced strips, I noticed my oven mitts and potholders are in deplorable condition and wouldn’t survive another washing. After checking on the Net, I discovered the required supplies are already in my stash to make new ones. BONUS!
Following a pattern I found on the Net, I sewed the paper-pieced strips together until I had a large enough pallet for making both sides of an oven mitt. I cut ‘ugly’ fabric to back these pallets and sandwiched them with thermal batting already on hand. Not trusting I would be able to successfully free-motion quilt, I marked a grid to follow for machine quilting. I quilted both pieces, traced the oven mitt pattern onto the backing fabric and sewed the front and back together creating the mitt shape. I turned it right side out and bound the bottom edge with binding left from another project. VOILA! A new oven mitt with no ‘real’ investment (except time) and it fits right in with my eclectic kitchen decor!
A similar process was used to make mug rugs but without thermal batting. Cotton batting was enough to make nice little desk ‘quilts’. I made 4 to replace the ugly, always dirty, stained saucer I use under my coffee mug. I’ll certainly enjoy using them.
I still have enough paper-pieced strips to make 3 hot pads/potholders. I’ve already cut the thermal batting and will attempt free-motion quilting later today. Even if they turn out badly, they will still be functional so as I’m attempting to learn new skills, I’m producing useable items. Win/win!
Shirl
Comments closed
Feet Don’t Fail Me Now!
By
I’ve always considered myself to have at least average intelligence. My IQ tests in the top 15% (only proving I’m good at taking tests) and before rebelling against the Honor Society, I was a member. I have a 4.0 grade point average in the few college classes I’ve taken and I read a lot.
My hands know many feats…. they hand quilt, hand sew, machine sew, knit, crochet, embroider, crewel, cross stitch, wedge and throw clay on a potters wheel, tole paint, hang wallpaper, lay wood or tile flooring, butcher, chop, dice, julienne, cut glass, make glass beads and rebuild 2 barrel or 4 barrel pre-80’s Holley carburetors, among other things.
Today, I’ve learned an important lesson about myself. My feet are DOG ASS STUPID!!! (sorry dogs). I’m surprised they can walk across a room without getting tangled….. uh…..most of the time.
I sat down today at my ‘new’ treadle 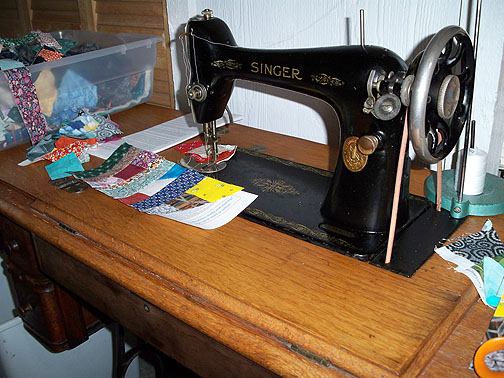 machine prepared to set the world on fire with my newest feat. I firmly planted my feet where my grandmother’s feet had gone before and SNAP! I broke the thread. I tried again and broke it again. I checked the machine and found no problem. I tried again and again only to SNAP, SNAP, SNAP!
It took me a minute to remember that straight stitch vintage treadle machines will NOT sew backward and feet weren’t born knowing how to pedal frontward. Just pumping the treadle pedal does not necessarily cause the machine to stitch forward. My own personal research indicates that freely pumping will result in snapped thread 98.7% of the time. One has to spin the handwheel forward and the feet have to catch up with the treadle in order to pump forward. One tiny slip up will break the thread EVERY BLASTED TIME!! Today I’ve learned VERY well how to thread the treadle machine needle!!!
I followed the advice of other treadlers and sewed scraps of fabric to paper foundations. This enables a newbie to learn to operate a treadle machine without wasting pristine, new fabric as she learns to treadle FORWARD. Hang wasting a bunch of thread!
I’ve saved lots of used printer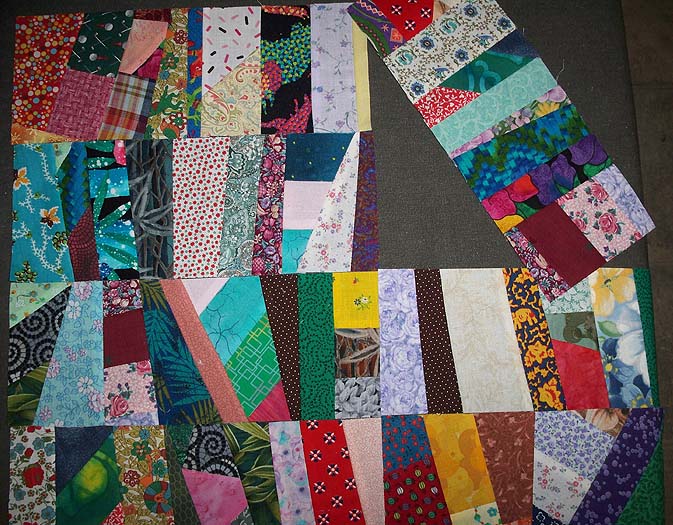 paper so I cut it in half lengthwise and with my scraps-n-crumbs bin within easy reach, I began ‘making fabric’ that can be sewn together later to make a bright, wild-n-crazy……. uh…….. something(?). I can either sew the strips together or cut them smaller before sewing them together to make a……. uh……. dog quilt? lap quilt? throw pillow? pot holders? oil changing rag?
I’ve decided it doesn’t matter what I’m making (besides a mess!). I’m teaching my feet a new feat and maybe, eventually, they will get a little smarter.
Shirl
The Continuing Saga of Mammie’s Machine – Part 3 or I’ve Created a Monster!
By
I GIVE UP (for the time being)!! I want to sew on a treadle machine NOW and IF Mammie’s machine ever sews again, it will be months/years before it will. At the moment, I’m overwhelmed by the amount of work still left to do on it. I’ll probably invest in a sonic parts cleaner before making further attempts. I WANT TO SEW!
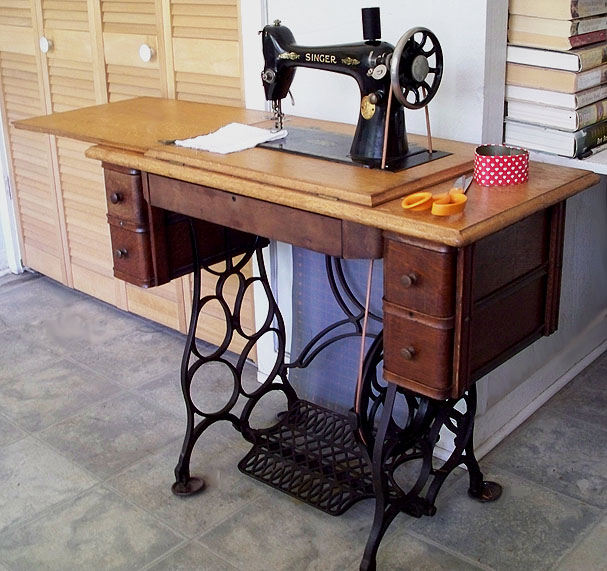
Because the pieces of Mammie’s treadle cabinet were beyond repair, I’ve been collecting the cheapest Singer cabinet parts I’ve been able to find. I wasn’t sure these parts would work with the National machine but National cabinet parts are near impossible to find (or afford). I didn’t want to spend a lot of money in case the Singer parts required radical modification. Thankfully (for me) there are lots of cheap bits and pieces available on eBay®.
Since I’m on sabbatical from cleaning the National, I decided to use the irons with a different machine head. I’d already purchased enough Singer bits to assemble a complete cabinet, so I thought a Singer head would be the wisest next purchase. I’ve been observing price increases since I’ve made other vintage machine purchases, so I figured I should get a treadle head while the getting is good. There are many available but I’d hoped to find something with ‘meaning’. I found just the one!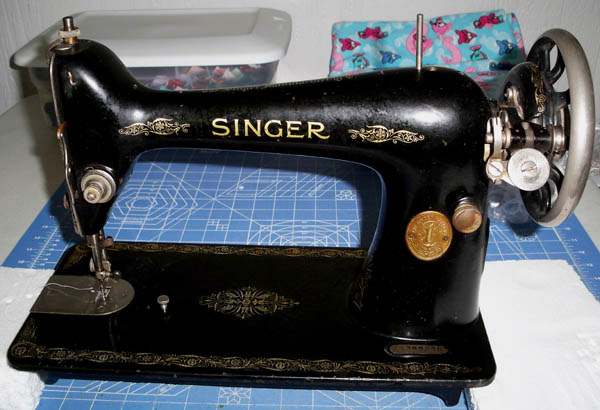
When I was a toddler, my mother owned a Singer model 66 treadle machine. I often sat under that machine and worked the treadle with my little hands as she fed fabric through the machine. When I was finally tall enough to stand with one foot on the treadle peddle and my nose just over the table edge to see the needle, I was allowed to run scrap fabric through the machine. I made lots of doll blankets, mudpie cup towels and playhouse curtains.
I found what I felt was a bargain for the right machine. There is no rust and the identical decals to my mom’s are in good shape. I tested it and she sews fine without adjustments. She was also manufactured May 19, 1925, the same year as Mammie’s National machine.
I assembled the cabinet and was only required to make a few modifications. In order to align the belt between the machine and treadle, I had to off-center the cabinet top. No biggie! In order for the center drawer to fit, I was forced to hang the side drawer frames further away from the irons, making it impossible to use the drawer frame hooks. No one will ever notice. When the machine top and lid were shipped, the hinges were damaged so I replaced them with other vintage hinges. Still no big deal. The biggest deal came when adding the cabinet underbelly and back (one unit). The belt didn’t align with the underbelly, requiring some modification. It only shows for small dogs and very short people and the dogs don’t seem to notice.
The cabinet back didn’t hang low enough to reach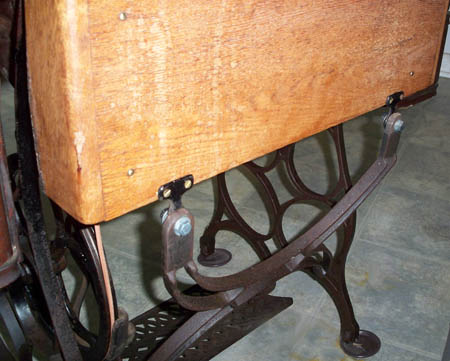 to the treadle brace. There was nothing I could figure out to modify the wood that wouldn’t look awful so I used some carriage bolts, washers and nuts along with the unused drawer frame hooks. It’s not the most beautiful solution but will look better after I blacken the bolts with shoe polish or Magic Marker. DH says it looks like something a GIRL would do, but hey, I qualify! He offered no better solution! At least the hooks are genuine vintage Singer parts! OK, I admit thankfully this is the back of the cabinet and who is going to notice besides those same small dogs and very short people?!
And now, I would like to present…….
FRANKENTREADLE!!!
It’s shabby-chic without that little bit of puke in my mouth! It’s steampunk without the steam or punk or weird hair cut! Someday, I may refinish the cabinet to make the individual parts more closely match but at the moment, I like it this way! Until then, I CAN SEW!!!
Shirl
Comments closed
Categories: Sewing
Continuing Saga of Mammie’s Machine – Part 2
By
I’ve continued aiming my attention on Mammie’s  National sewing machine; working on more detail cleaning, de-sludging and rust removal. After reading some articles about cleaning vintage machines, I decided to soak the rusty face, bobbin and needle plates in a vinegar/salt solution. Without precise measuring, I used a concentration of around 2 cups of 5% white vinegar (enough to cover the parts) and 1-2 tablespoons of Kosher salt. I allowed them to soak for 6 hours; then rinsed the parts and soaked them again in a similar solution for another 6 hours. When I thought they were as clean as possible without further pitting the finish, I rinsed the parts well and waxed them with automotive carnuba wax. Though the parts are still rough, I’m quite pleased with the result. I can always decide later to work further on these parts but it felt like time to move on to the next step.
With the entire machine begging for attention, I decided to next concentrate on the bobbin area.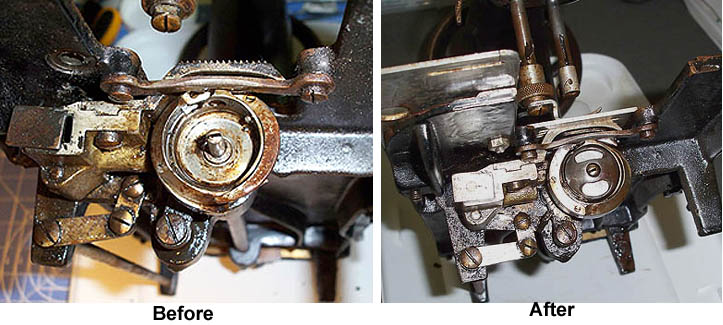
Upon receiving this machine, I was extremely pleased to find the bobbin case and a bobbin of thread in the machine. I discarded the old, rotten thread and cleaned the bobbin and case with machine oil and a worn green pad. It cleaned to my satisfaction.
The bobbin/feed dog area required some careful scraping and prodding with an exacto knife, stiff artist brushes and dental tools. After removing the oily lint and wiping the area, the feed dogs are clean. I did much the same around the bobbin area to remove old oil and sludge. It’s clean enough and moves freely. I applied a thin layer of fresh oil.
The next area I’ve worked is the side behind the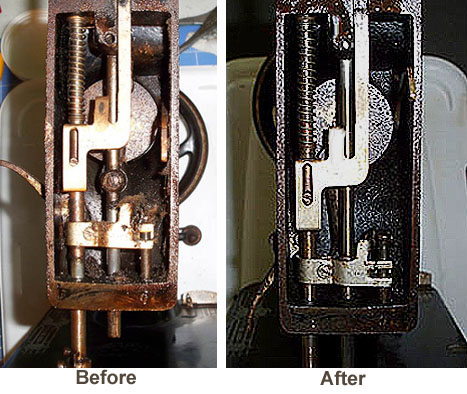 faceplate. It was equally as grungy as the rest of the machine. With stuff brushes and oil, I was able to rid the area of sludge. At this point, I’ve decided unless I completely disassemble the machine and sonically clean each part, there’s little hope of making the machine pristine. Everything will remain ‘good enough’.
I decided to give some attention to the other end of the machine. Although the hand wheel and bobbin winder parts move freely, they are encased in rust. I’d like to try improving their looks. I’ve tried removing the huge flatslot screw holding the bobbin winder to the machine. No luck, even after being soaked in oil for months. I even tried walloping the screwdriver with a rubber mallet but the screw still will not budge. Heck, so much of this machine needs attention, I decided to skip working on the bobbin winder at this time and concentrate on the hand wheel.
I’ve found instructions for removing a Singer hand wheel on the 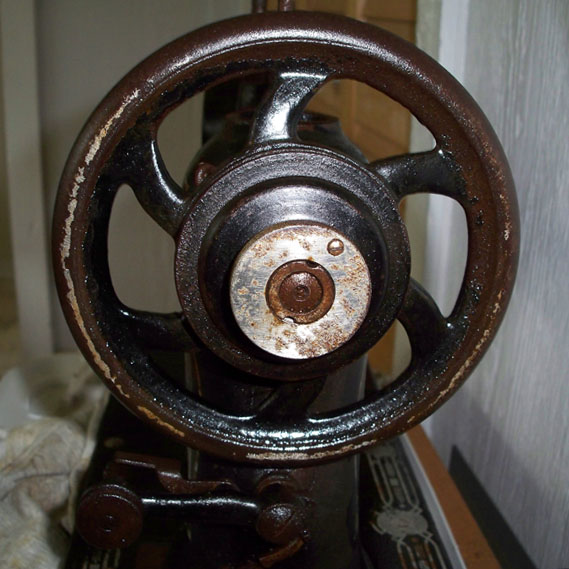 Net. As recommended, I photographed each part as it was removed and laid them in order on a clean rag. Unfortunately, I ran into a dead end. After pinching and scraping a few knuckles, hitting it with a rubber mallet and cursing, the hand wheel remains steadfast. I just can’t figure out how it comes apart. I decided it would be a better option to reassemble the hand wheel and walk away from the machine. After unsuccessfully trying to disassemble both the bobbin winder and hand wheel, I could feel my frustration mounting. It was time to point my attention in another direction.
A few days have since passed and I’ve re-oiled the machine head and placed it back into it’s padded box. I will continue to research how to move forward with this machine and know I will soon return to it, fresh and undefeated.
In the meantime, I have quilts to finish and clothing to sew on any of several vintage, working machines.
I really want to sew on a treadle!
More soon.
Shirl
Continuing Saga of Mammie’s Machine – Part 1
By
I really, really, really wanted to invest some time to refurbish my grandmother’s treadle sewing machine. I can’t say I actually remember her using it because she purchased an electric machine possibly before I was born. I do know she sewed a zillion stitches on her treadle machine, including sewing for the public to help with the family budget. She was a very resourceful woman and a fabulous seamstress.
From stories she told, I knew she had purchased this National treadle sewing machine in 1925 (the year she married) and when I was in my mid 20’s, I asked if she had sold it or given it away. She explained she put it in the dirt floor lean-to shed attached to the hay barn after purchasing a modern, electric machine. The shed was open on 3 sides so the treadle machine was near totally exposed to the elements (including blowing rain, sand, hay dust, kids, chickens, mice, etc.) for several decades. I asked if I could have the machine and she said if I could get it out, it was mine.
I was excited… until I saw the machine. It had literally sunk about 18″ into the sandy mud, requiring a shovel for removal. The cabinet was destroyed with only the top and one drawer front nearly recognizable. Under the drawer front, we found a metal box of rusty machine attachments. Everything was a complete sad mess.
Hubby saw my disappointment but encouraged me to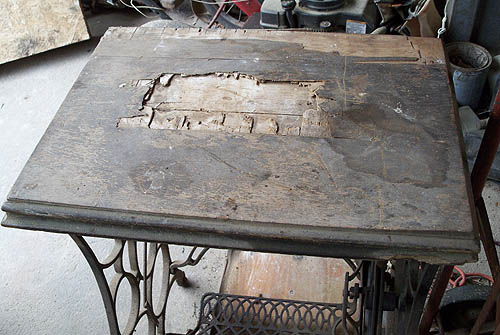 bring it home and we would work to restore it together. Unfortunately, life got in the way and the machine sat in our high-n-dry wood-floor barn for 3 more decades, until my recent interest in vintage sewing machines sprouted and grew.
I brought it from the barn into the garage for a general dust-off and spiderweb removal. As you can see in the photo, the top was wrecked and unsalvageable. The treadle and machine head were both frozen from rust, old oil and sand. In hopes of making something move, I doused the entire thing with machine oil and let it sit for 48 hours.
The treadle mechanism slowly began breaking loose so I continued dousing it with oil every few days. After several weeks, the treadle moved freely and the machine hand wheel turned easily. It took another week of oiling to enable the bobbin cover plate to swing open and the button release to allow the head to tilt back for access to the machine bottom. I continued applying oil in hopes of flushing some of the sand, rust and sludge from the machine. It’s amazing how much gunk came out!
When I felt the sludge was finally flushed away as much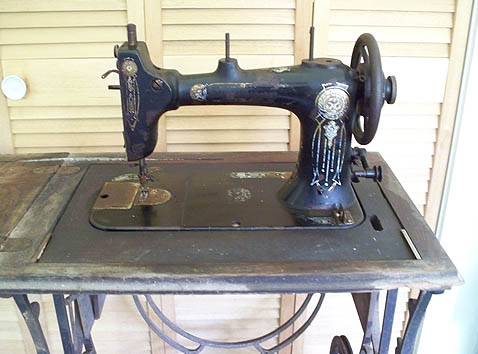 as oil would accomplish, I moved it into the house for more detailed cleaning. I removed the head and cabinet parts so the irons could be scrubbed and oiled. Other than quite a bit of rust, the irons and treadle are in surprisingly good shape and operate smoothly. I’ve sat the head on a tray and continue to apply oil while I concentrate on removing some rust from the face, bobbin and needle plates. I’ll soak them in a vinegar/salt solution and hope for the best.
I’ve accepted the machine will never be beautiful but because it was Mammie’s, it will always be special!
More soon.
Shirl
Comments closed

